Any successful organization should automate the build and release process to shorten the delivery time and to avoid costly mistakes. Today, we are going to talk about how to automate the build of an ASP.NET Core Docker Container project in VSTS and release the artifacts straight to Azure Kubernetes PODs. In our last post, we talked about “Deploy ASP.NET Core Application in Linux Container in Azure Kubernetes Service (AKS)” in details. In this post, we would focus on how to configure build and release definitions in VSTS and deploy the new version of the api application to Azure Kubernetes PODs.
I thought the configuration of build process would be easy but, like many others, I experienced some of the common problems. I am going to share some of the issues came along the way with the resolutions. Without further delay, let me get to the story!
Learning Objectives
- Configure Build Definition
- Configure Release Definition
- Deploy to Kubernetes Cluster
Configure Build Definition
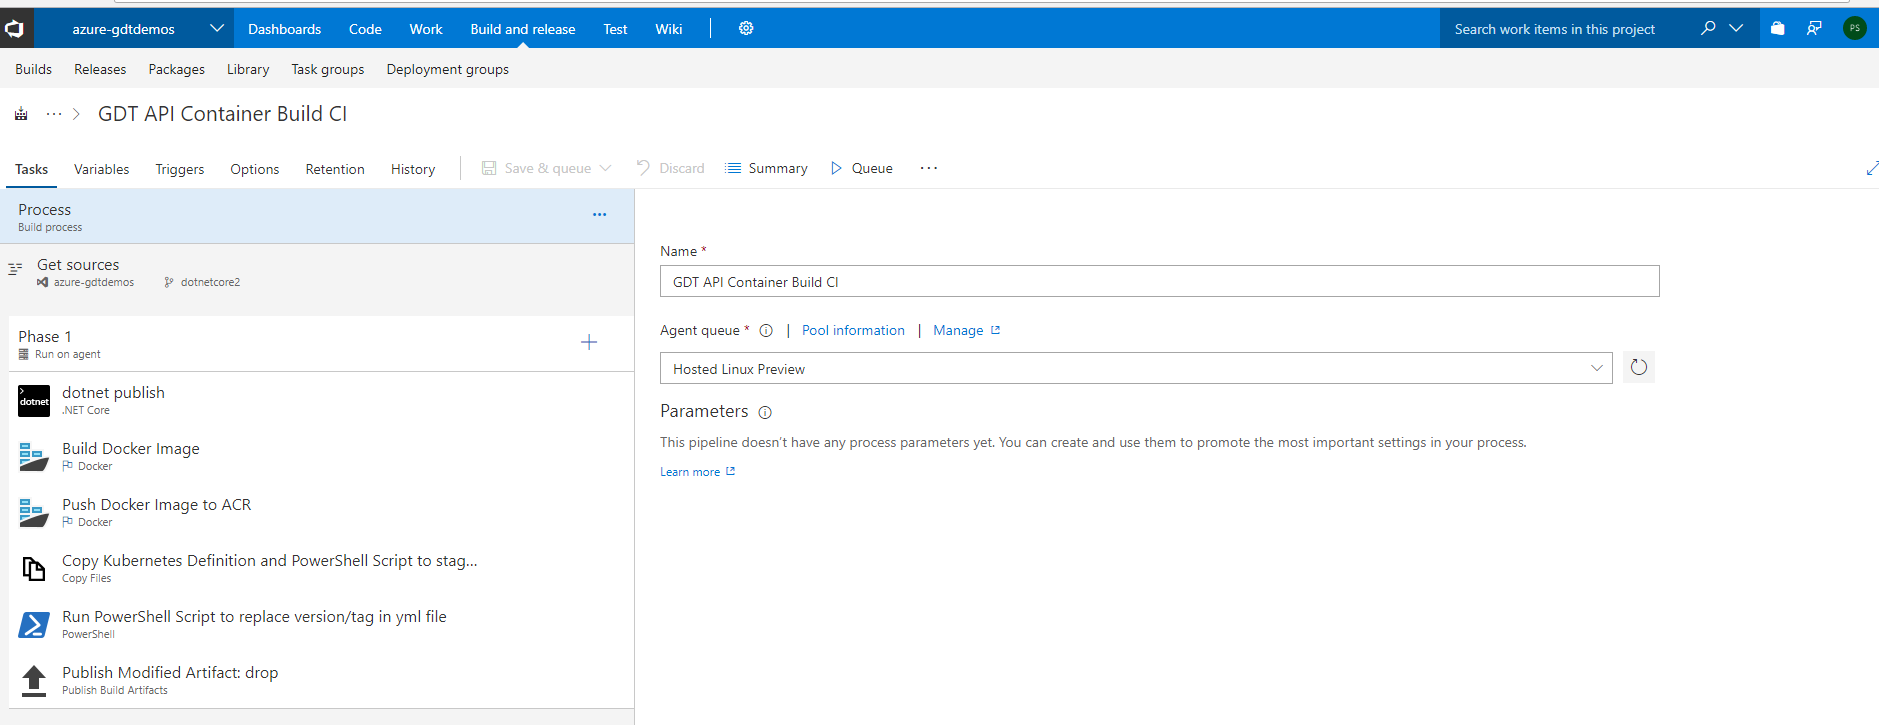
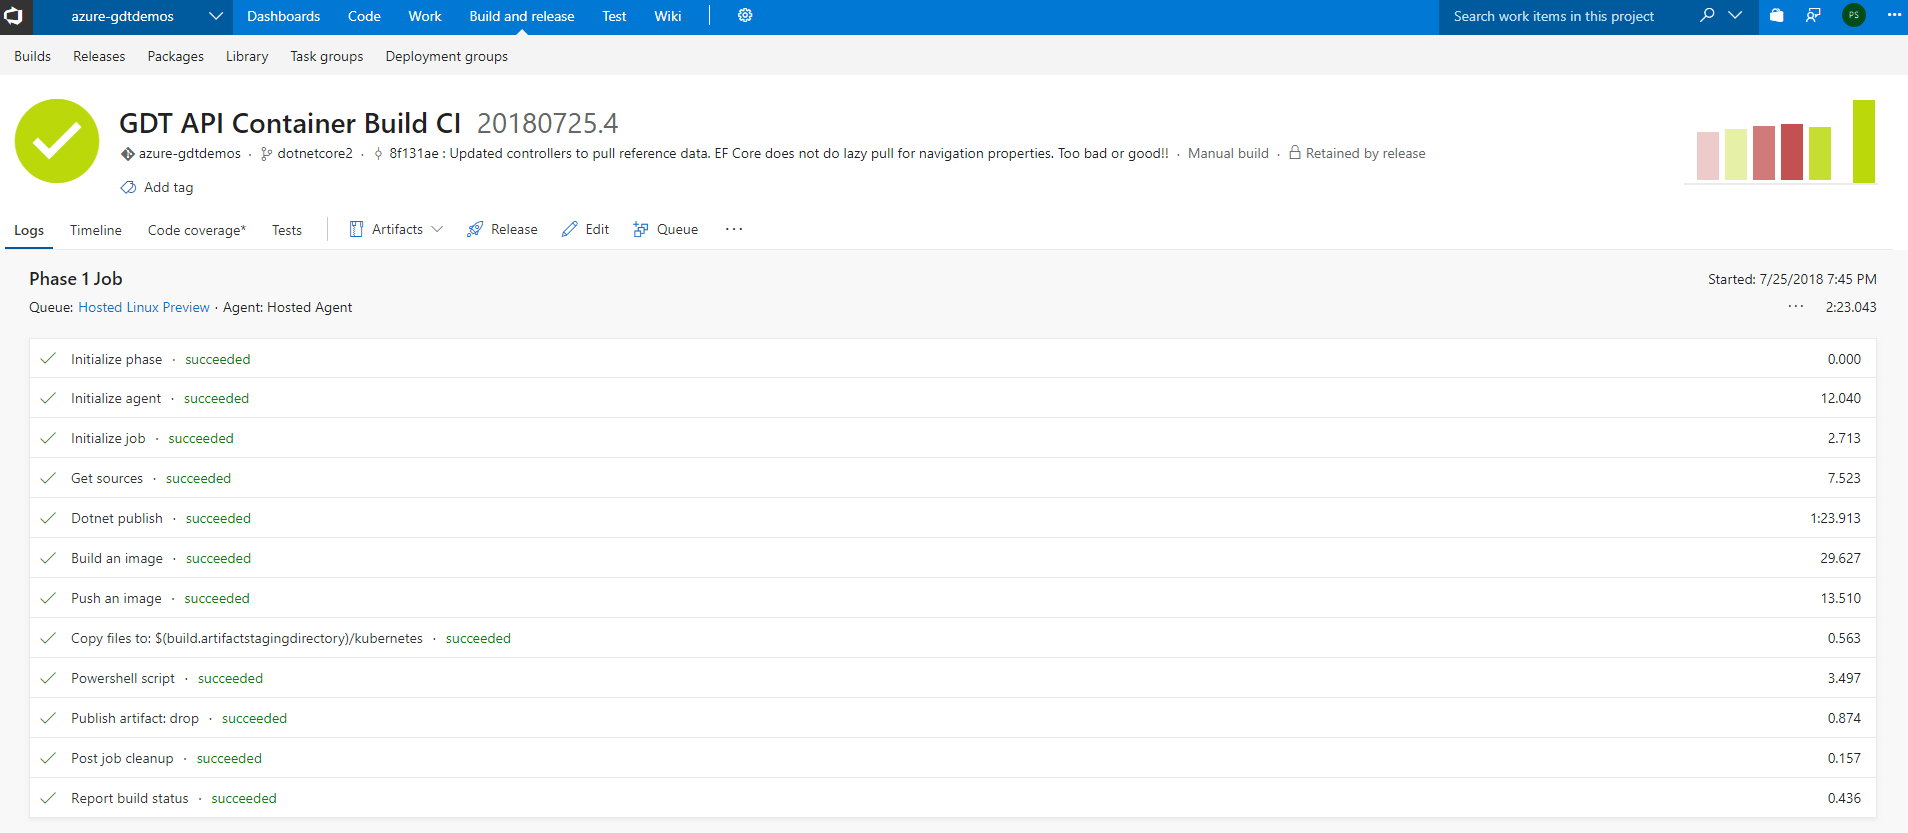
GDT API Container Build CI pipeline consists of multiple steps/tasks. Here is how the overall pipeline looks and I would go detail on each step. Our goal is to deploy the application on Linux OS. So, the build queue agent should be Hosted Linux.
Step 1: dotnet publish
First step is to compile and publish ASP.NET Core project. You will need to provide the command, path to project and arguments.
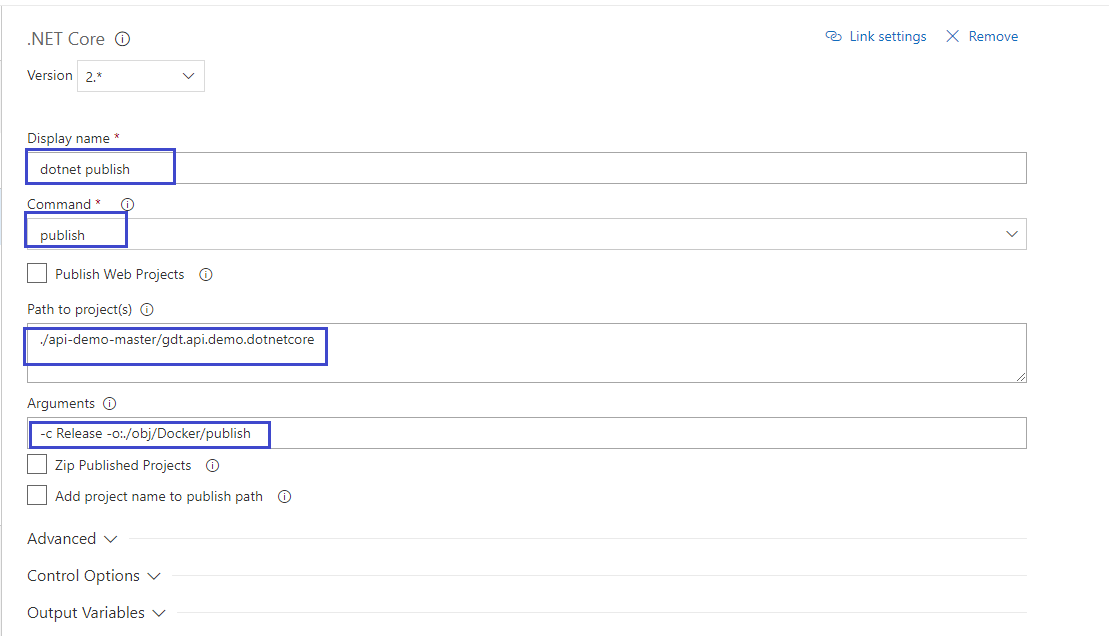
Command: “publish”
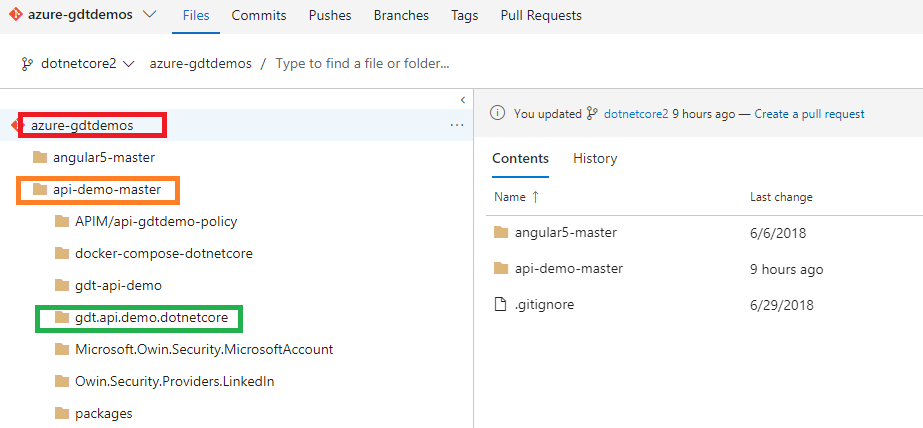
Path to project is relative to VSTS project: “./api-demo-master/gdt.api.demo.dotnetcore”. Notice that we just need to provide project path
Arguments: “-c Release -o:./obj/Docker/publish”. Build is going to use Release configuration and build output is saved in /obj/Docker/publish (relative to project path)
I was getting “… obj/Docker/publish: no such file or directory.” famous error and, as the error message says, there is no such file or folder. I was trying to execute Docker build and I was thinking it would compile ASP.NET core project and do the publish task! I used docker-compose on my local machine and it took care of the compilation and publishing part. Docker build task in VSTS simply builds the image and it expects previous step to do the publishing job! The error disappeared once I added dotnet publish task before docker build.

Step 2: Build Docker Image
You will need to have Azure subscription and provision Azure Container Registry prior to configuring this task. You must be Global Admin to configure azure subscription.
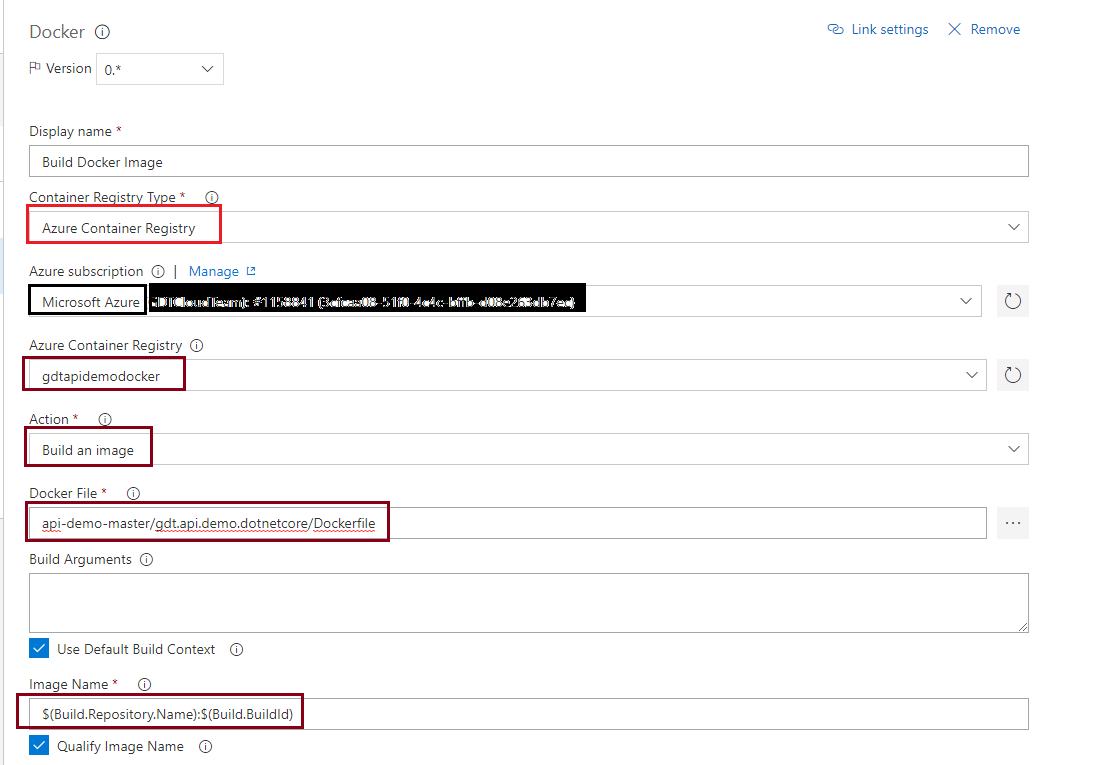
Docker file: “api-demo-master/gdt.api.demo.dotnetcore/Dockerfile”. This is relative to VSTS project path. I would suggest you browse to the path.
Image name: “$(Build.Repository.Name):$(Build.BuildId)”. I kept the default value but you can change based on your needs.
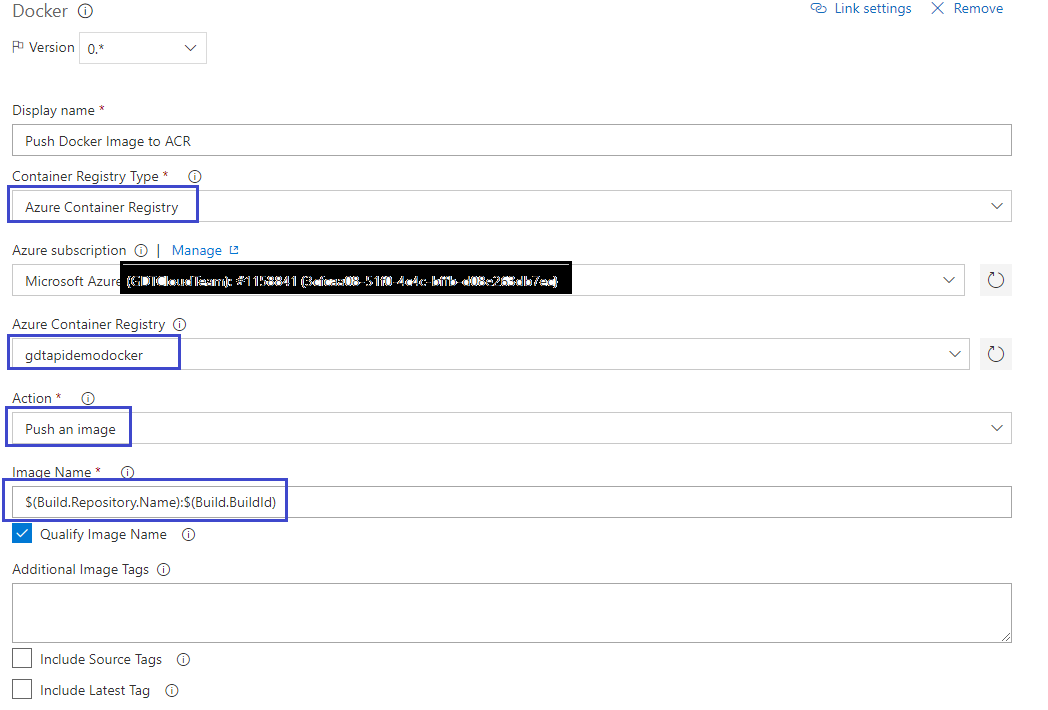
Step 3: Push Docker Image to ACR
This step is simple and it is responsible for pushing the docker image to azure container registry (ACR). Make sure Image name matches the one specified in the previous step. Image name: “$(Build.Repository.Name):$(Build.BuildId)”.
Step 4: Copy Kubernetes Definition and PowerShell Script to staging location
We intend to use configuration (yml) file at kubectl apply during the release process. Configuration file resides in VSTS and it is static but we have to change the version tag during the build. We stored both the yml configurations and powershell file in the same folder in VSTS. This step will copy the files from VSTS and save in $(Build.ArtifactStagingDirectory)/Kubernetes folder. Source folder is a folder in VSTS and you can browse to select a folder or file. I am selecting folder since I have to copy multiple files.
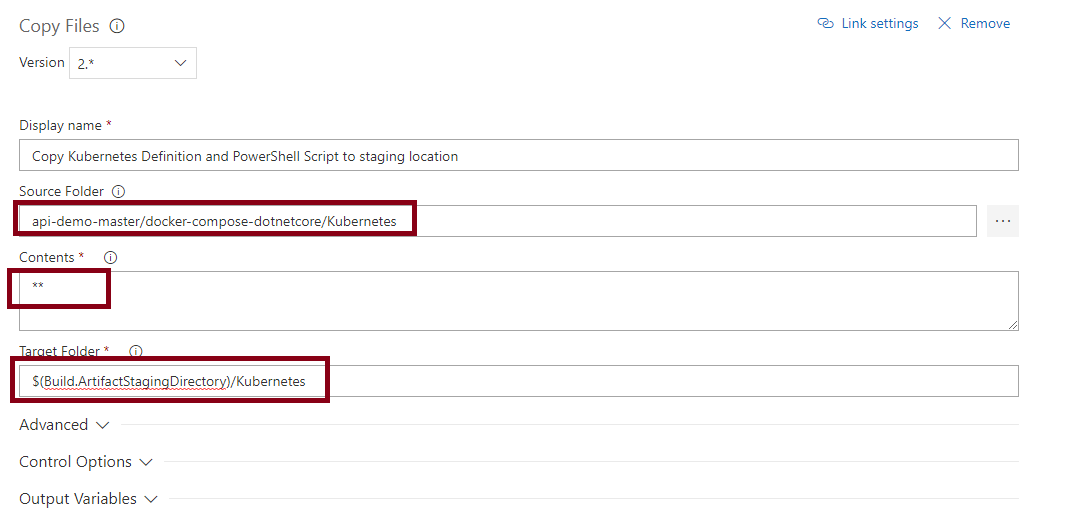
Pay attention to Target folder: “$(Build.ArtifactStagingDirectory)/Kubernetes”. We will need it in the following step(s).
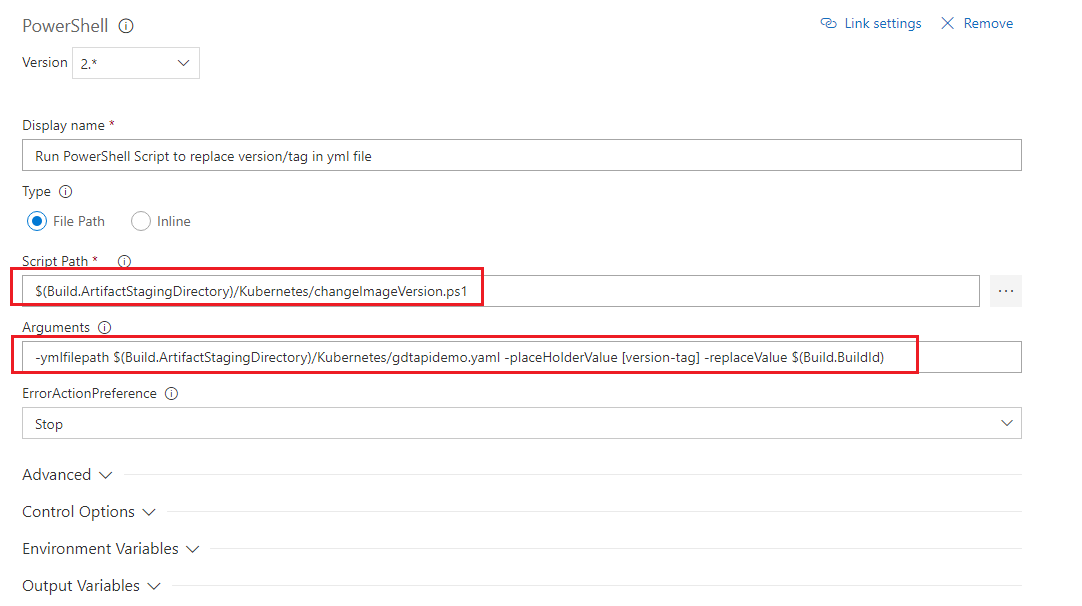
Step 5: Run PowerShell Script to replace version/tag in yml file
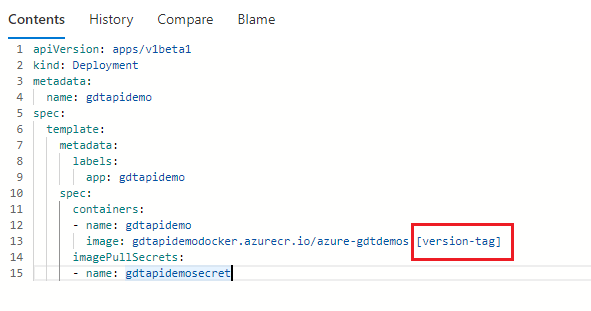
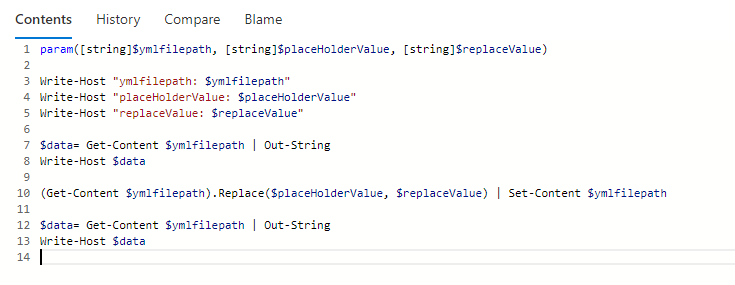
There is not a built-in step to modify contents during the build process and we are not going to use 3rd party tool to keep the dependency simple. Fortunately, PowerShell is powerful and we can do almost anything! In this step, we would search and replace [version-tag] place holder with the build number in yml file and save the file.
Yml file:
Here is how powershell script look like-
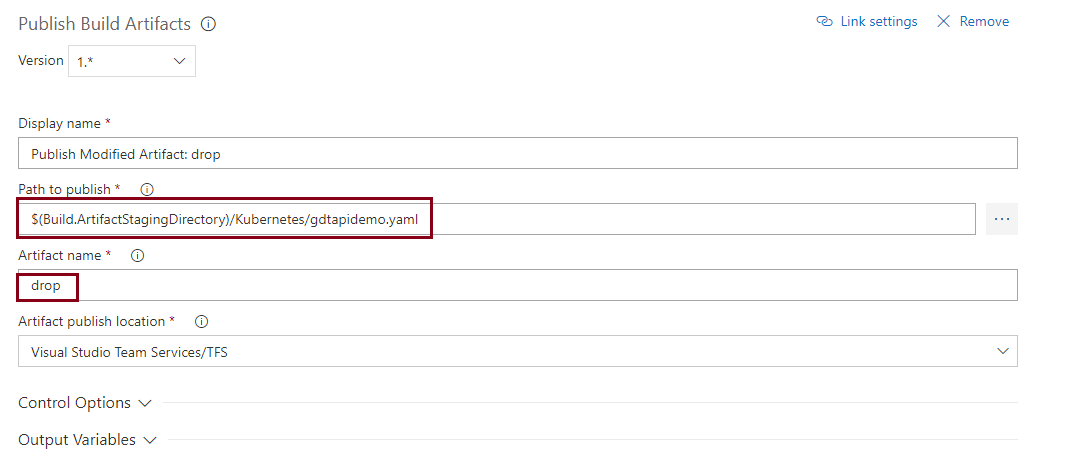
Step 6: Publish Modified Artifact: drop
Docker image has been pushed to ACR in Step 3 but we will need Kubernetes configuration (yml) file updated with the build number. Publish Build Artifact does the job.
If we did everything right, we will have a clean build! Well, it was not the case for me and success comes after failures! Let’s do a clean build.
Let’s look at the logs from PowerShell Task:
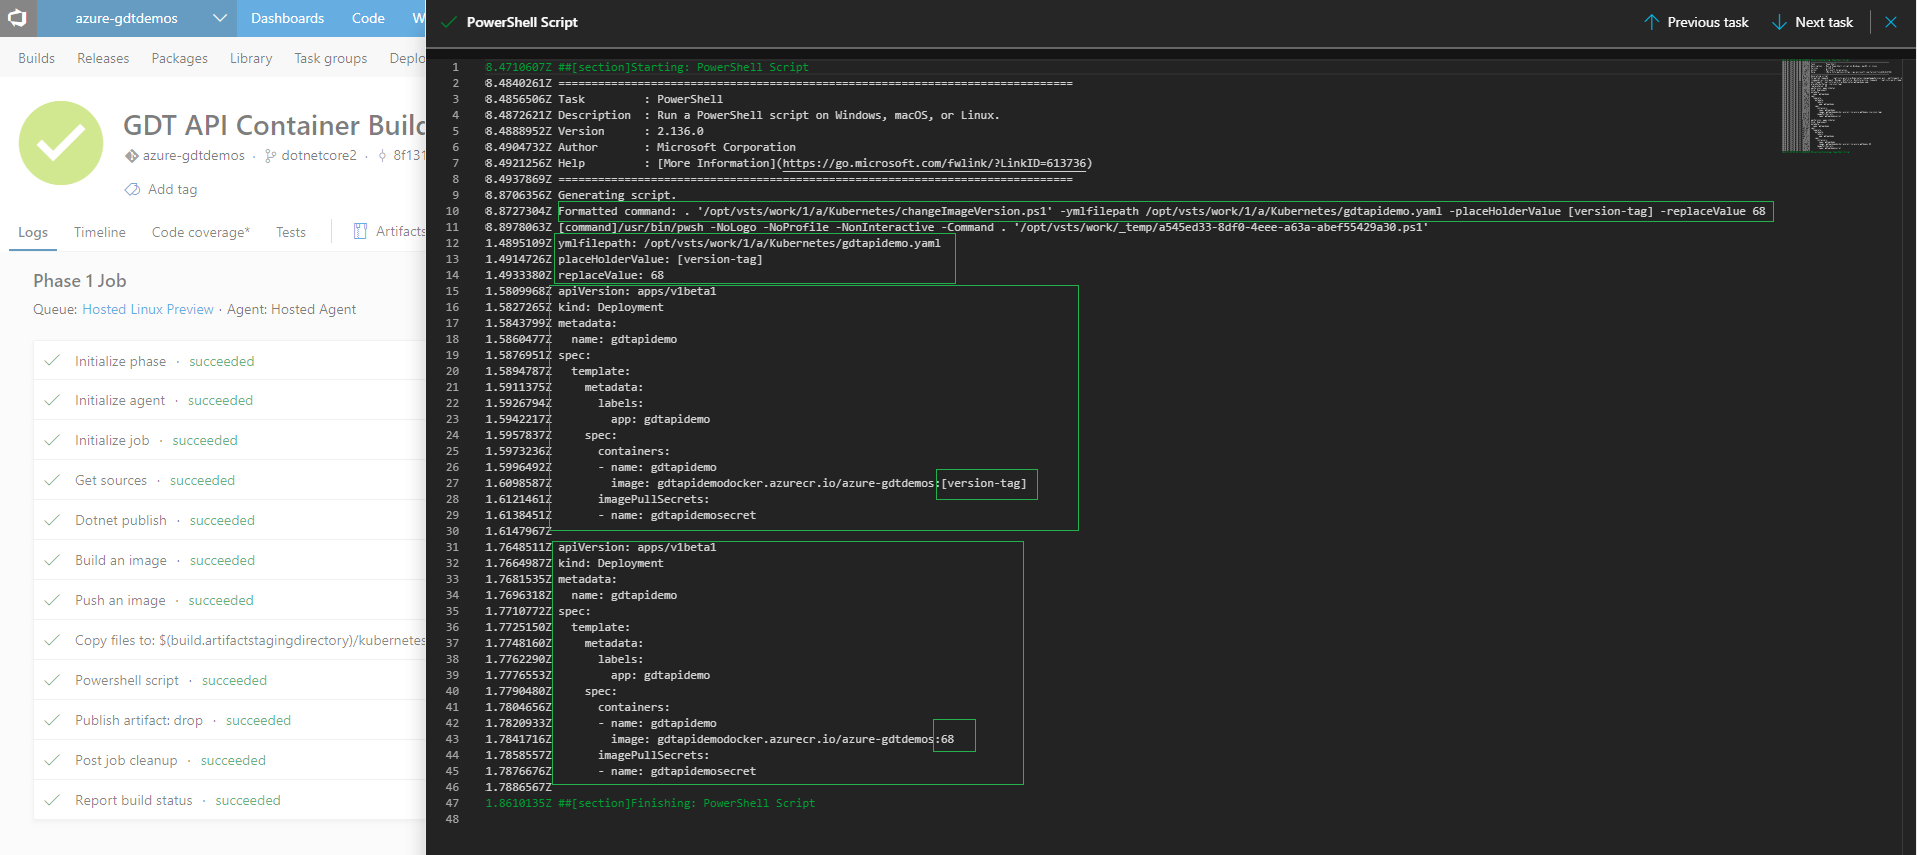
Yahoo! We have successfully built the project, pushed image to ACR and published the artifact. Our next goal is to configure release definition.
Configure Release Definition
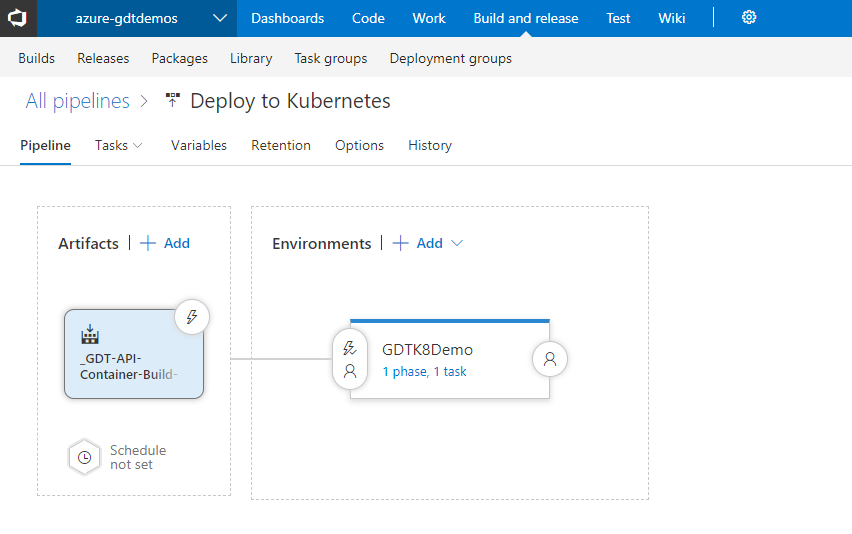
Release definition requires two parts- Artifacts and Environment. What’s in the artifact? Remember, we already pushed the docker image to ACR during the build and we don’t need the image in the artifact. We need the gdtapidemo.yaml configuration file which we published in the build process. Here is the release pipeline look like-
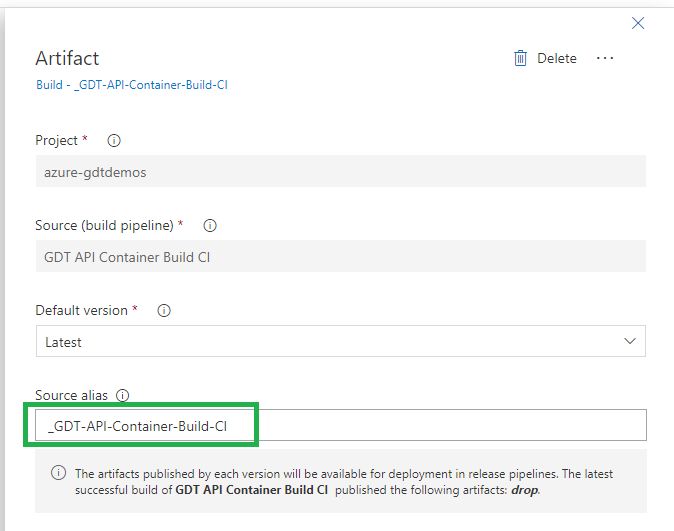
Define Artifact
Please take note of the alias, we would be using it in environment configuration
Define Environment
Environment name: “GDTK8Demo”. You can name anything you want!
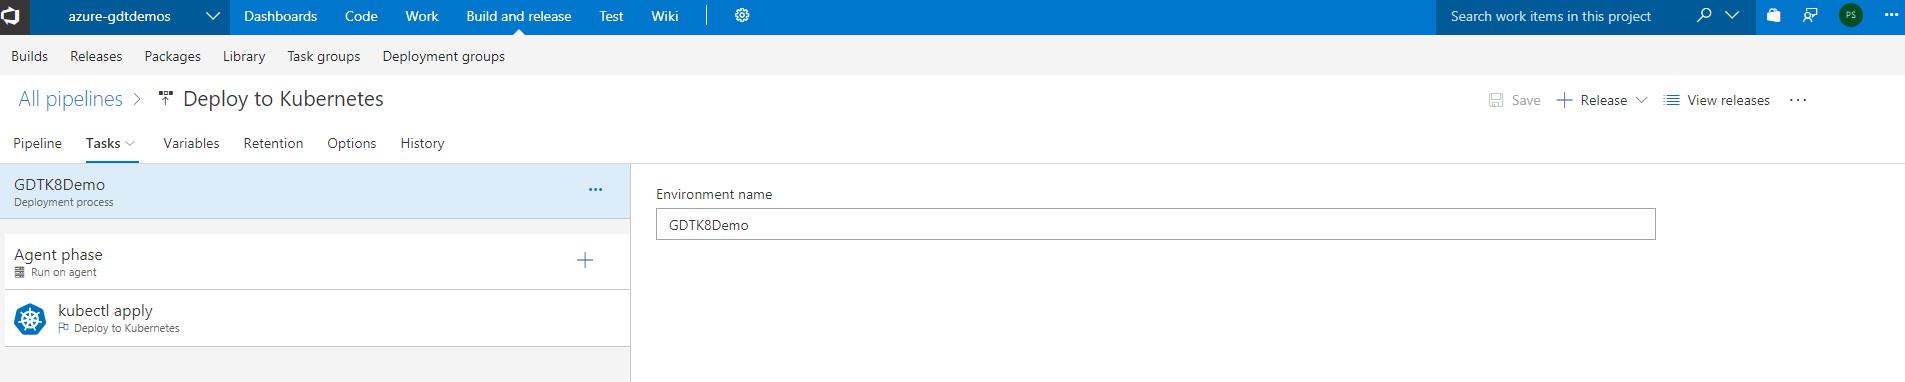
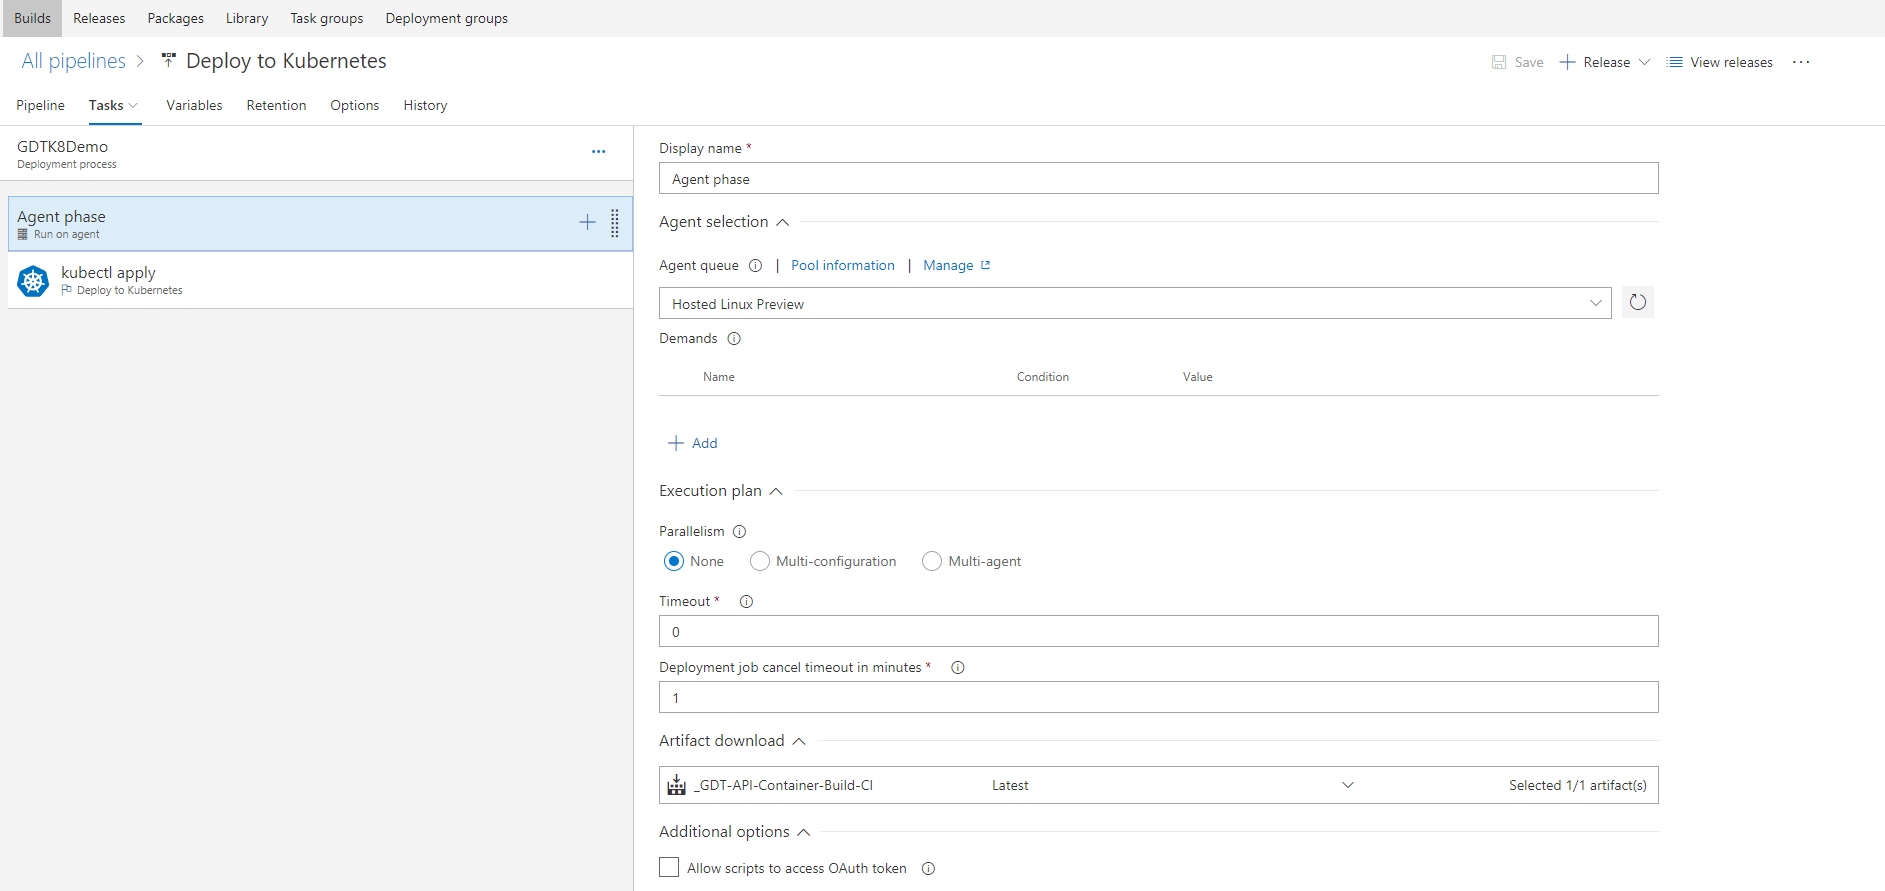
Agent Phase: Configure agent queue and artifact to download. We used Hosted Linux for build agent queue and we would use same here.
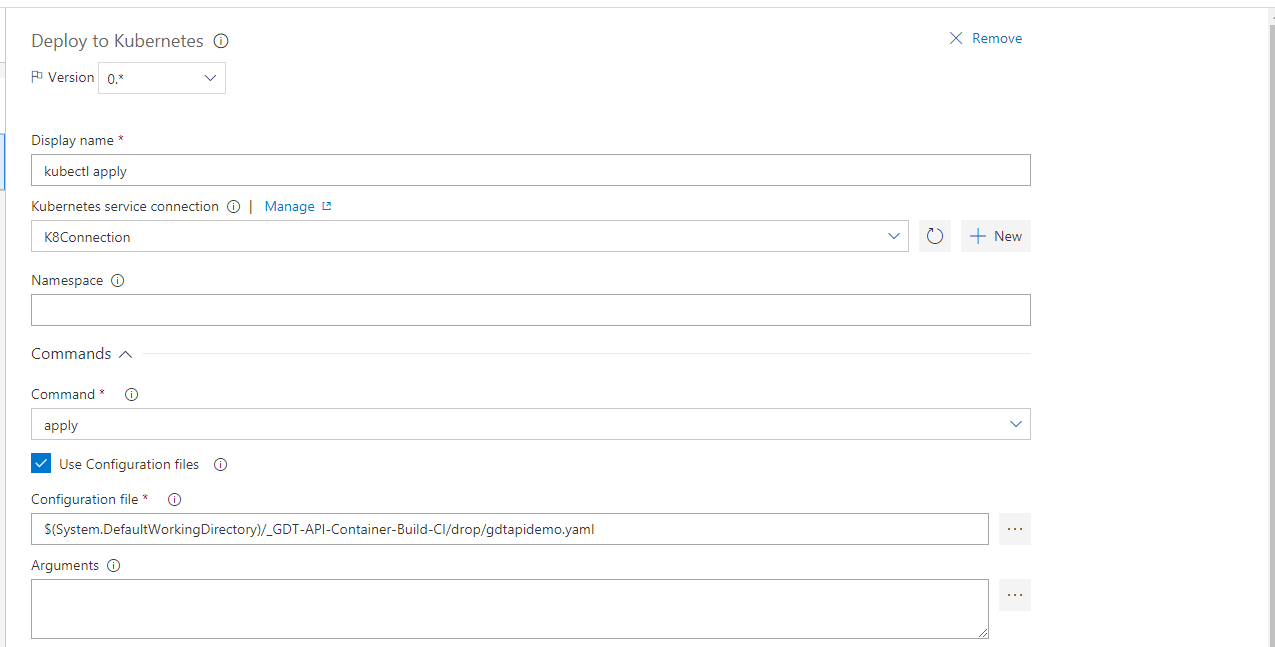
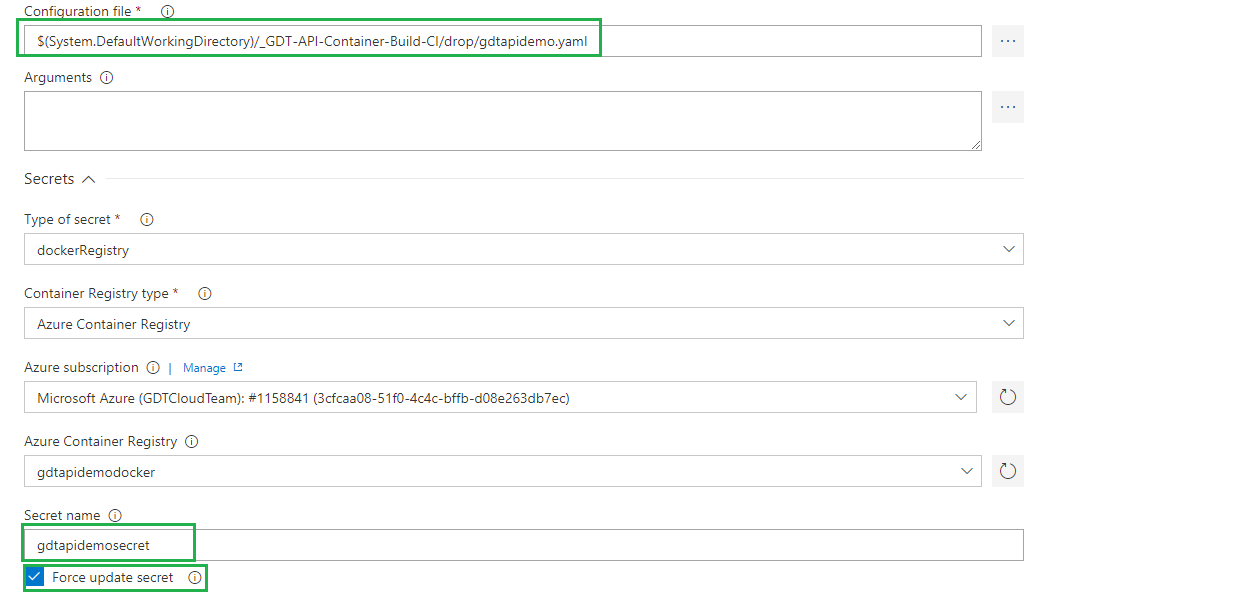
Kubctl apply: This is the main task in the release definition where you specify command, configuration file and secrete. Follow the figures below to configure kubctl apply settings.
That’s all we need to configure the release definition!
Deploy Build Artifacts to Kubernetes
Okay, we are done with build, release and now it’s time to deploy the app in Kubernetes. Click on +Release and Deploy/Approve.
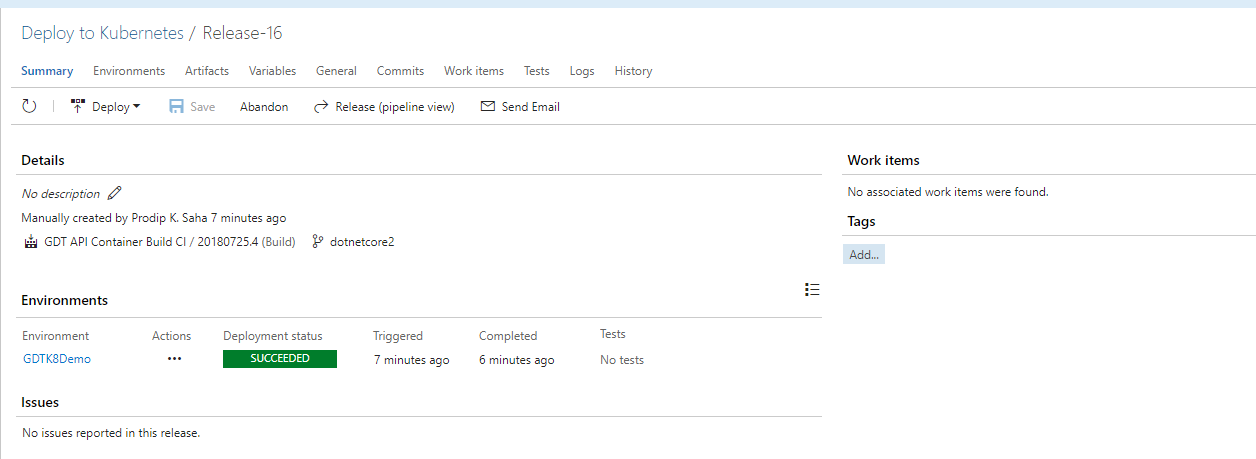
VSTS says deployment is succeeded but we need to verify if the app with correct build version is indeed deployed in Kubernetes cluster. We can add more kubctl steps in the release pipeline to get the status but, for simplicity, we are going to check it manually at the Kubernetes dashboard.
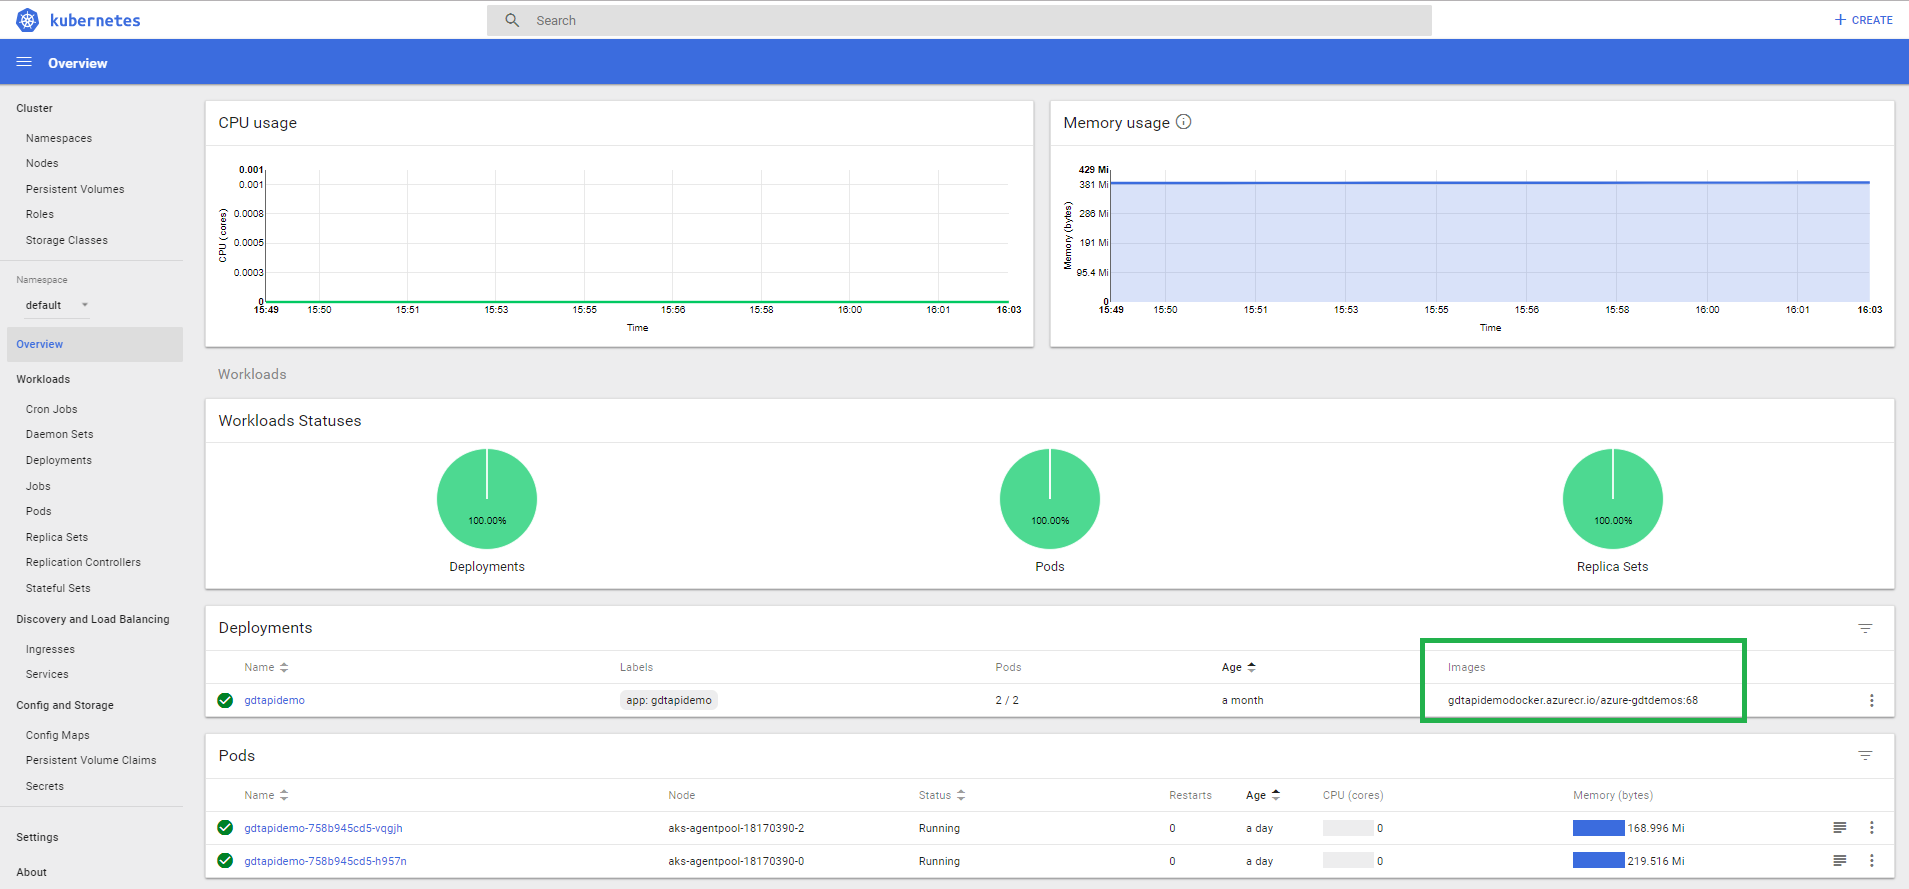
Yep! Our build number 68 is deployed and apps are running in the pods. Mission accomplished!