Azure Automation Desired State Configuration (DSC) provides a highly available configuration management solution at scale. As the organization grows, it’s infrastructure grows as well and it become difficult to manage machines with desired configurations and error prone if you try to configure manually. Azure Automation Account along with Desired State Configuration (DSC) allow you to automate the configuration and deployment process. Let’s keep the intro short and get to the real-business!
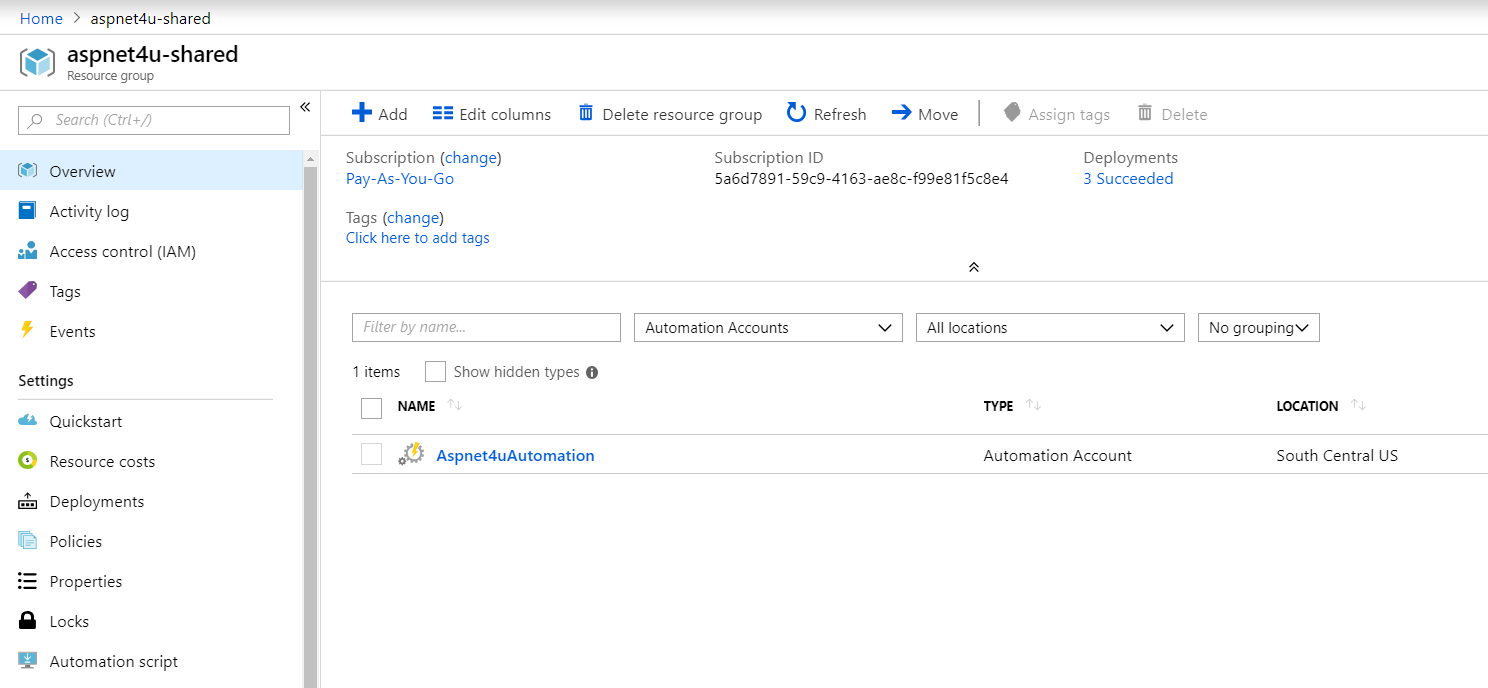
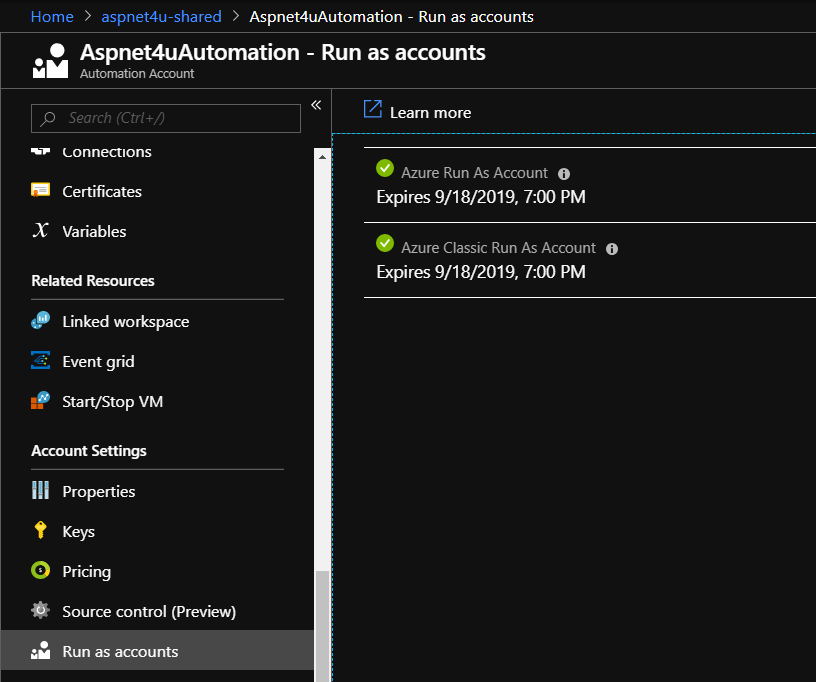
First, you will need to create an Automation. Login to Azure Portal and provision an automation account with Azure Run As Account. Below is an example of Automation Account and Azure Run As Account-
Next, you would navigate to State Configuration (DSC) blade under Automation Account. There are few tabs under DSC. Configurations is the tab we would go first and upload our desired state configuration (PowerShell Script) file.
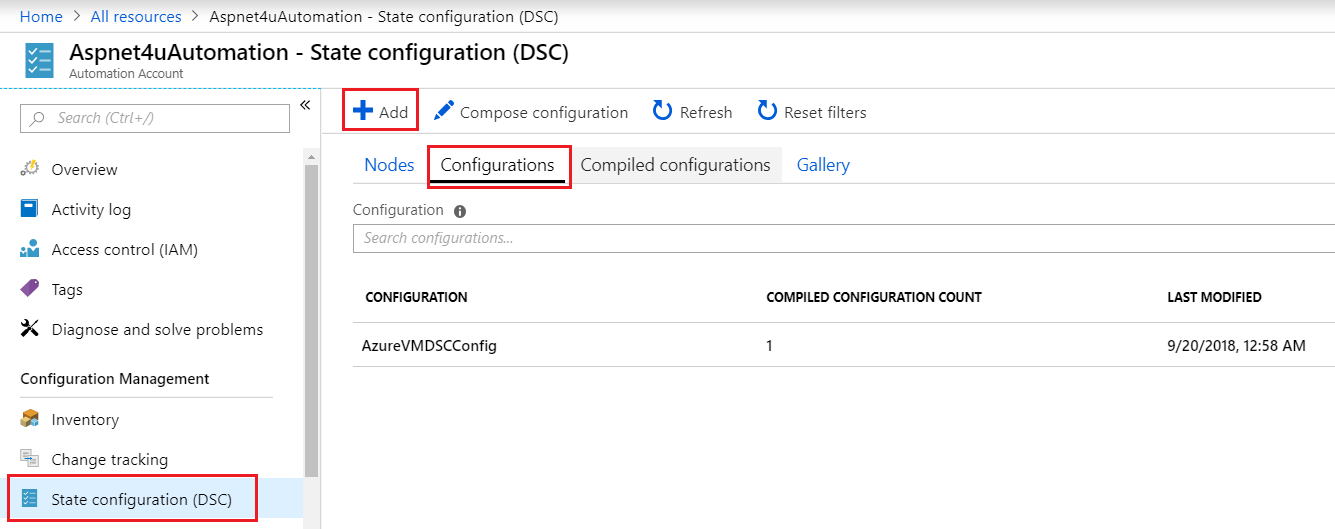
While at the configuration tab, click on Add to upload the script file. Once you upload and click Ok, you will see configuration entry (as you can see at the screenshot above).

Oh, wait! I need to share the most important part which is configuration script!
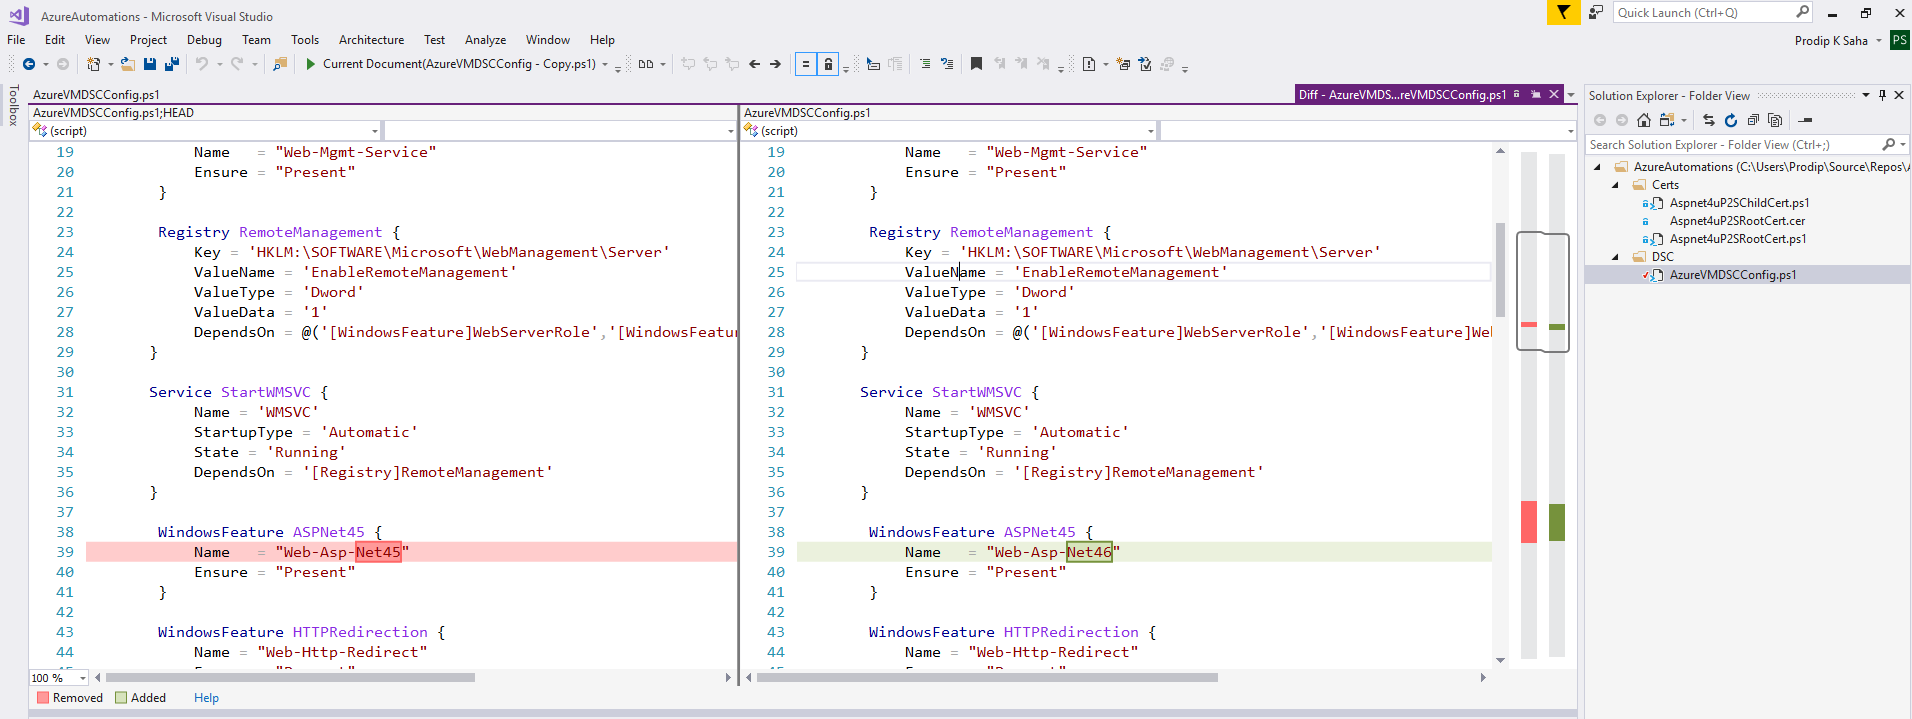
configuration AzureVMDSCConfig { Import-DscResource -ModuleName PSDesiredStateConfiguration Node WebServer { # Install IIS features WindowsFeature WebServerRole { Name = "Web-Server" Ensure = "Present" } WindowsFeature WebManagementConsole { Name = "Web-Mgmt-Console" Ensure = "Present" } WindowsFeature WebManagementService { Name = "Web-Mgmt-Service" Ensure = "Present" } Registry RemoteManagement { Key = 'HKLM:\SOFTWARE\Microsoft\WebManagement\Server' ValueName = 'EnableRemoteManagement' ValueType = 'Dword' ValueData = '1' DependsOn = @('[WindowsFeature]WebServerRole','[WindowsFeature]WebManagementService') } Service StartWMSVC { Name = 'WMSVC' StartupType = 'Automatic' State = 'Running' DependsOn = '[Registry]RemoteManagement' } WindowsFeature ASPNet45 { Name = "Web-Asp-Net46" Ensure = "Present" } WindowsFeature HTTPRedirection { Name = "Web-Http-Redirect" Ensure = "Present" } WindowsFeature CustomLogging { Name = "Web-Custom-Logging" Ensure = "Present" } WindowsFeature LogginTools { Name = "Web-Log-Libraries" Ensure = "Present" } WindowsFeature RequestMonitor { Name = "Web-Request-Monitor" Ensure = "Present" } WindowsFeature Tracing { Name = "Web-Http-Tracing" Ensure = "Present" } WindowsFeature BasicAuthentication { Name = "Web-Basic-Auth" Ensure = "Present" } WindowsFeature ApplicationInitialization { Name = "Web-AppInit" Ensure = "Present" } ## IIS URL Rewrite module download and install #Package UrlRewrite { # DependsOn = "[WindowsFeature]WebServerRole" # Ensure = "Present" # Name = "IIS URL Rewrite Module 2" # Path = "http://download.microsoft.com/download/6/7/D/67D80164-7DD0-48AF-86E3-DE7A182D6815/rewrite_2.0_rtw_x64.msi" # Arguments = "/quiet" # ProductId = "EB675D0A-2C95-405B-BEE8-B42A65D23E11" #} File DirectoryCreate { Ensure = 'Present' Type = 'Directory' DestinationPath = "C:\inetpub\APIDemo" } Log AfterDirectoryCreate { Message = 'Directory created using DSC' DependsOn = '[File]DirectoryCreate' } Group IISReader { Ensure = 'Present' GroupName = 'IISReader' } } } # Credit/Ack: # https://github.com/Azure/azure-quickstart-templates/blob/master/201-vm-win-iis-app-ssl/dsc/appDSC.ps1 # http://www.jasonhelmick.com/2016/04/24/configuring-iis-remote-management-with-dsc/ |
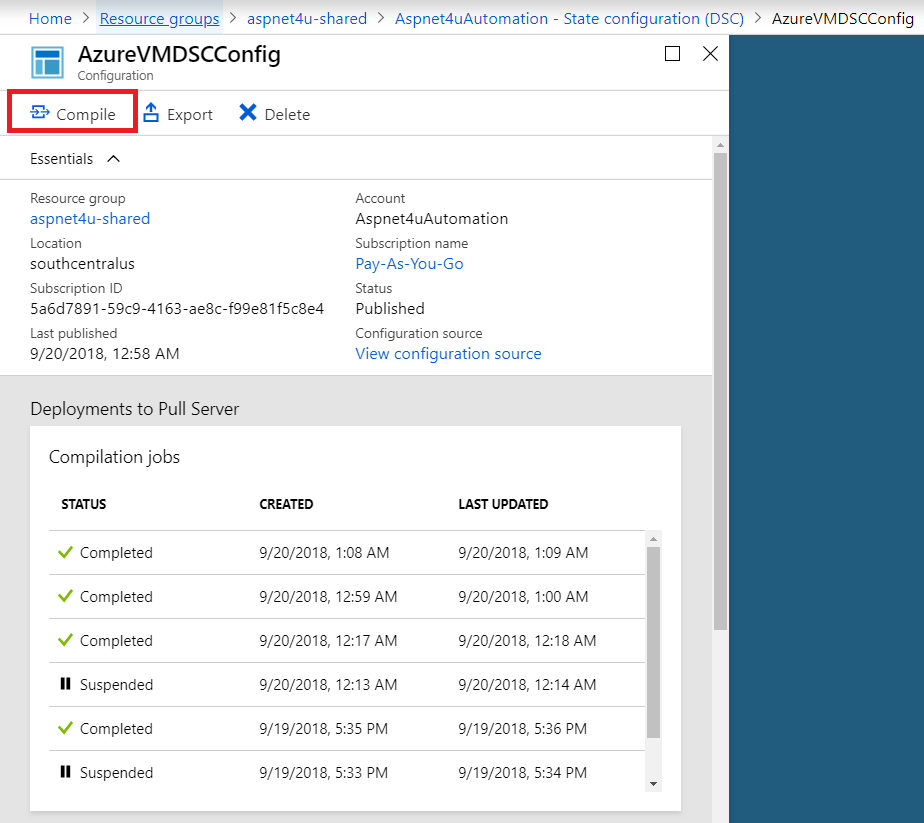
You will need to compile the configuration. Click on the just uploaded configuration item and Compile. It takes couple of minutes to compile. I have done few times and you would see multiple status! Suspended meaning, it did not compile due to error in the script and you can view details.
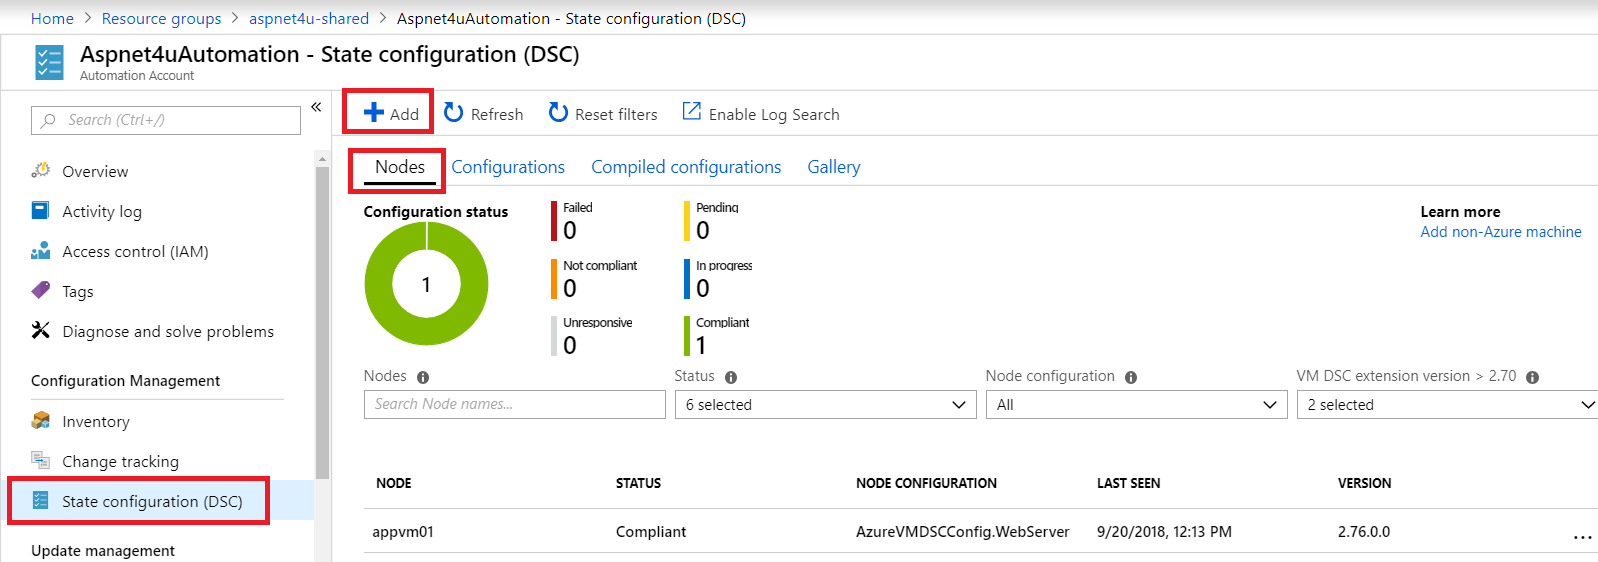
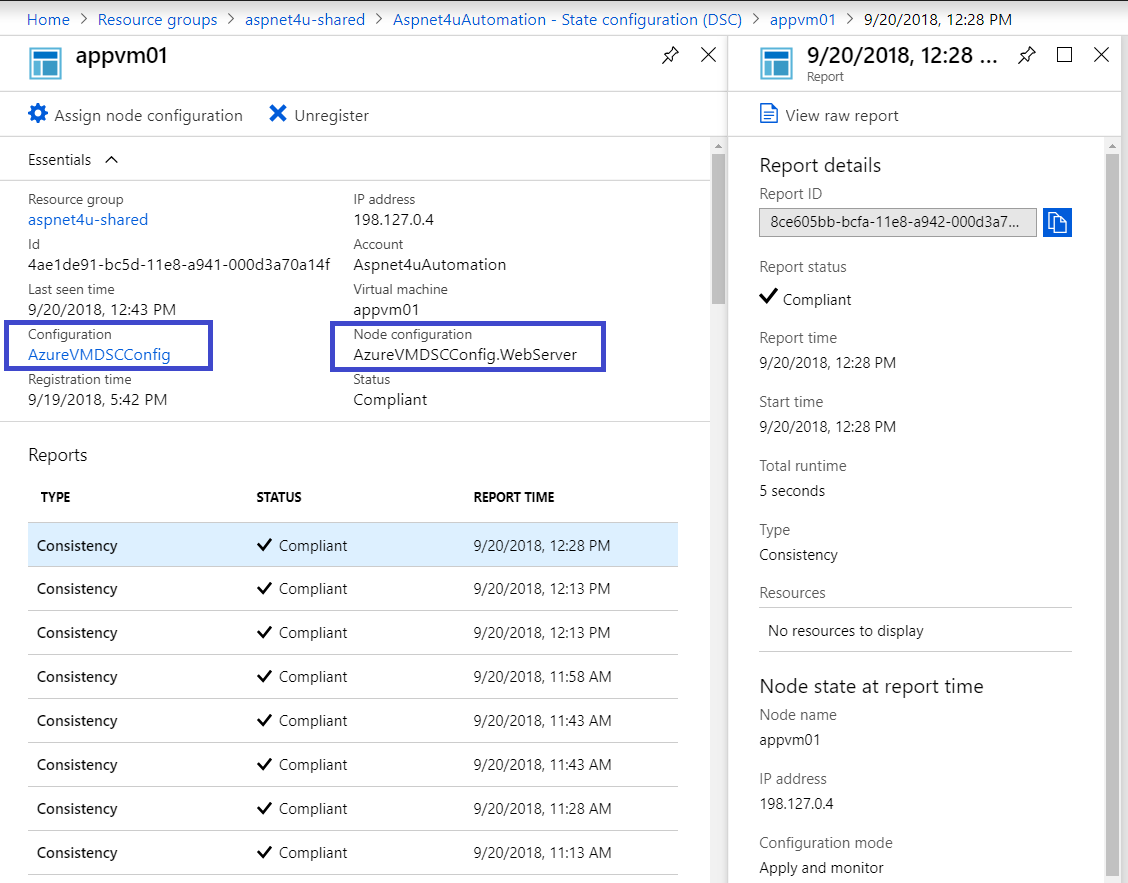
Okay, script is compiled and ready to be pushed to VM. So, we need to go back to State Configuration blade and navigate to Nodes tab. Click Add button to add one of more VMs and click Connect. I have added one VM and connected already! You will be asked to provide node configuration and you would select the configuration you just complied from the dropdown list.
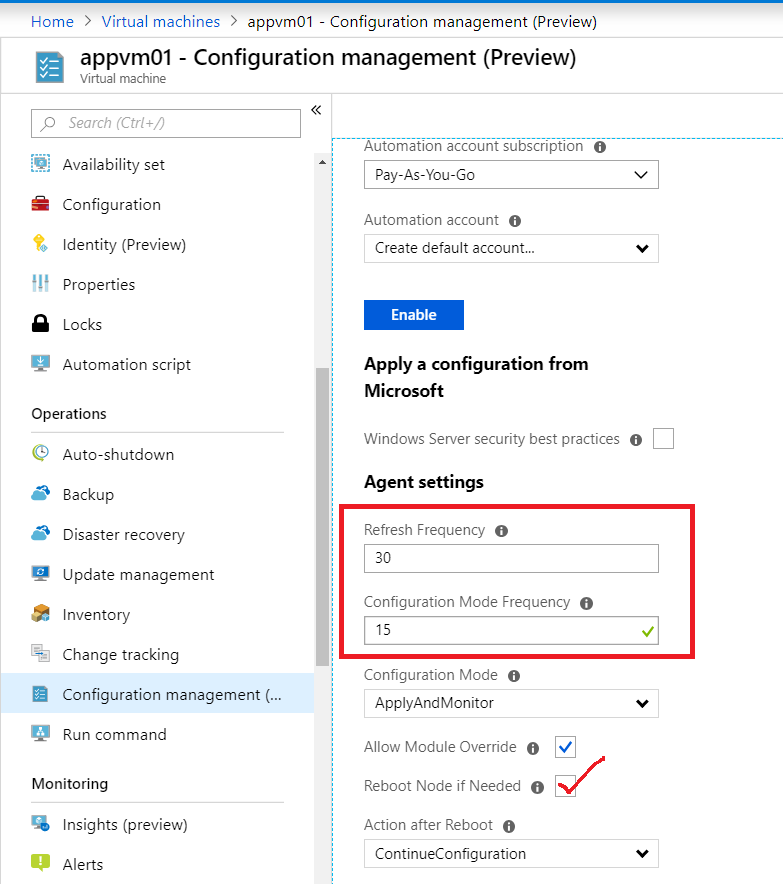
Once connected, script will start to deploy on the VMs based on the Refresh/Mode Frequency values.
You can change the pull frequency at the Configuration Management blade of the VM (at a later time).
Okay, now the script status is showing Compliant (no error), we need to RDP to VM and verify the features are indeed installed! Yep, VM is updated as per desired state configuration!
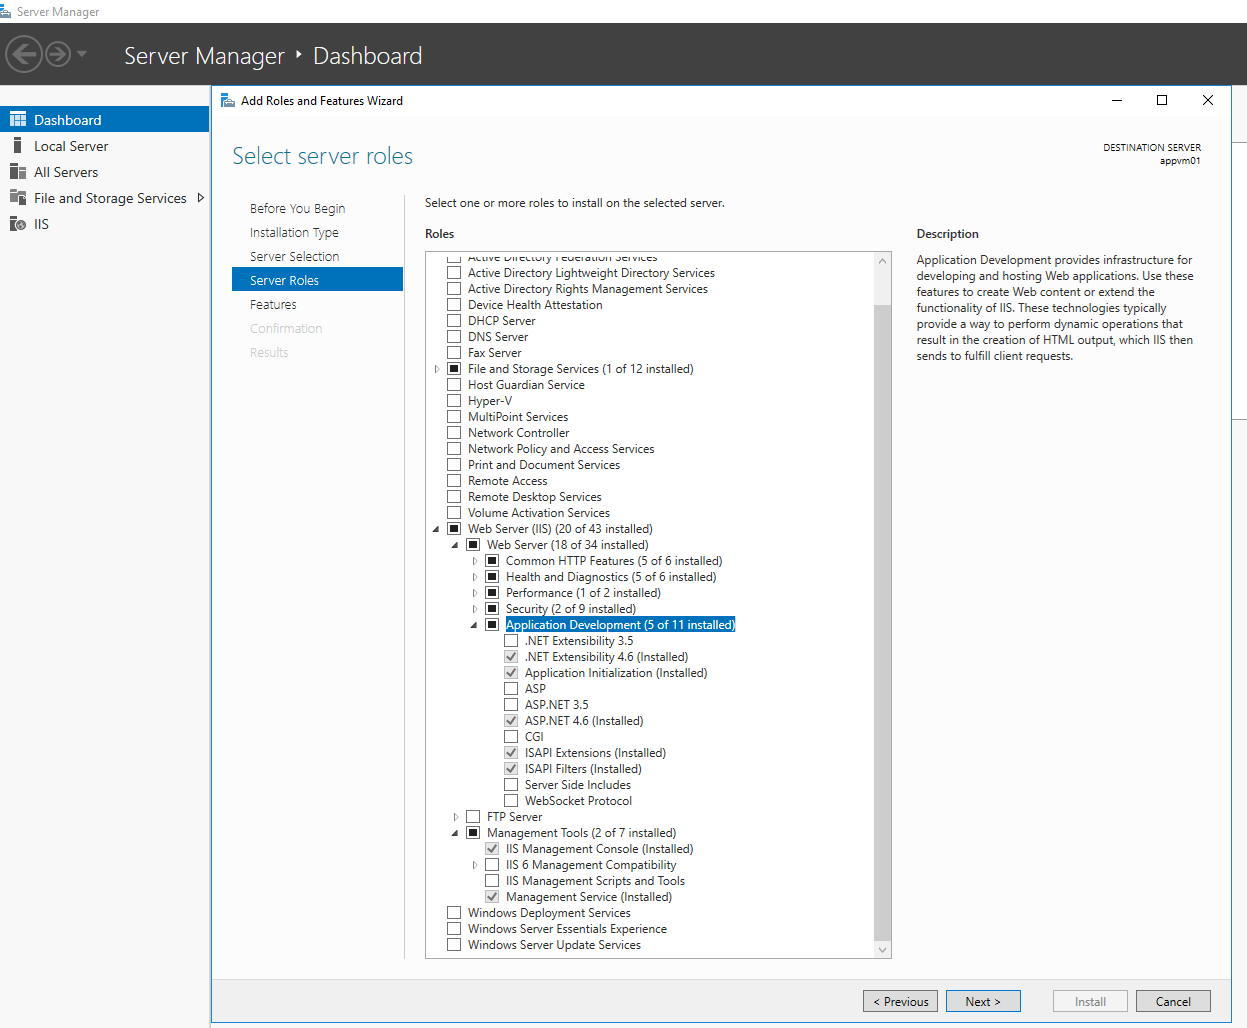
I have used only one VM for the demo but you can apply DSC to as many like VM’s and update them at scale. It’s important that you store the scripts into a source code repository and maintain versions. I am maintaining the scripts in VSTS but you can use repository of your choice. Azure VM that I provisioned came with ASPNET46 and my earlier attempt to use ASPNET45 resulted in error!
Happy Azure Automation with Desired State Configuration (DSC)! For additional information, you can visit https://docs.microsoft.com/en-us/azure/automation/automation-dsc-getting-started.